Learn How to Go Viral: 7 Creative Video Ideas for Influencer
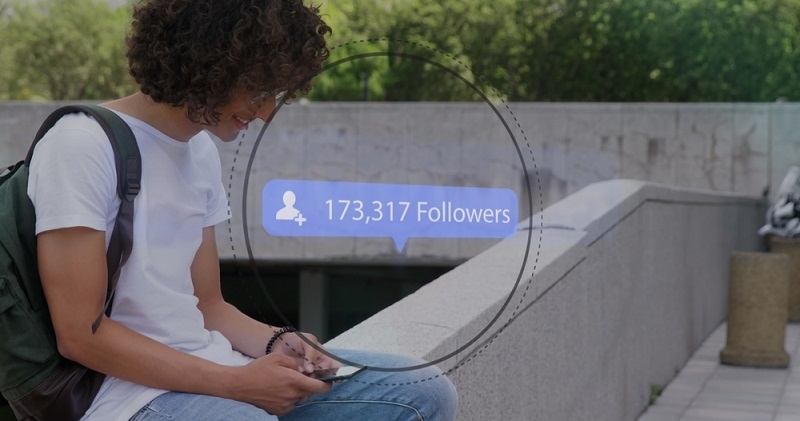
Virtually every content creator or producer wishes that the content goes viral. Be it just that one video surfacing with the perfect cocktail of creativity, engagement, and timing; at that point, the online presence could completely explode, bringing thousands if not millions of views, likes, and followers. But going viral is not just the function of luck-it is coming to understand what works from one platform to another, keeping on top of trends, and producing content that can resonate with an audience.1. Short-Form Content: Quick and ImpactfulShort-form content has taken over social media, with TikTok, Instagram Reels, and YouTube Shorts running videos that last less than a few seconds; they just go through one minute. The precious entertainment pieces are appropriate in such a fast-moving digital world, where users can scroll endlessly. Most importantly, one's one-shot act must perform magic within the first three seconds.It has to be engaging, to the point, and visually captivating. If one does not hook them right away, they will not think twice before scrolling past without looking back. Much of the excellent short-form content has quick cuts, catchy music, text overlays, and fun visuals. Humor, shock value, or surprising twists hold the audience glued to the screen. It would allow creators to post quick life hacks, bite-sized tutorials, product reviews, transformation comparisons, and even relatable everyday moments. Plus, since short-form videos play in an automatic loop, a well-made video will entice many views, thus maximizing the chance of the algorithm recommending it outside.2. Instagram Reels: Maximize DiscoverabilityInstagram has shifted its focus to video content, making Instagram Reels one of the most effective ways to grow an audience. Unlike traditional posts that primarily reach followers, Reels have the potential to go viral beyond your immediate audience, appearing on the Explore page and Reels feed. To create a viral Instagram Reel, you must capitalize on trends, use engaging audio, and add high-quality visuals. Since Instagram's algorithm favors videos that keep people watching until the end, concise and engaging storytelling is crucial. Videos that provoke curiosity, such as before-and-after shots, quick DIY tutorials, or relatable humor, perform exceptionally well.Another powerful strategy is leveraging trending sounds and hashtags. Instagram frequently promotes Reels that use popular songs and audio clips, making them more likely to reach a broader audience. If a particular sound is gaining traction, hopping on the trend quickly can boost your video's visibility. Incorporating text overlays, subtitles, and call-to-actions (CTAs) like "Tag a friend who needs to see this!" or "Drop your thoughts in the comments" encourages engagement, further increasing the chances of virality.3. TikTok Trends: Making Rides to Viral WavesTikTok is a game-changer now all over the universe, virality is made possible even for heads that do not have a substantial count of followers. The app revolves around trends, a dance challenge, viral sounds, meme formats, popular filters, and so on. Early birds catch the worm: those who consume trends early stand to gain visibility for their video, since TikTok's algorithm favors videos in line with prevailing interests among active users. For a would-be TikTok's viral-content creator, nimble activity tracking the hottest trending hashtags, sounds, and challenges is vital. That location would be the "For You" page (FYP): most viral content exists there, so grabbing and participating in the right trending activity at the right moment puts you in a position to probably get a feature spot there.It is better to add one's touch of change rather than having a straightforward interpretation of them. A twist of humor, surprise, or subject-specific context makes the video more attractive in front of so many videos with similar content. Suppose a dancing trend is crude; humor or a surprise element (like a dancing pet) can send that dancing trend viral. Duet and Stitch features on TikTok allow creators to respond to or build new content following existing viral videos, providing a great arena for engagement. Great sources make new creations possible by encouraging the interaction between the original creator's audience and a new potential audience.4. Engagement Boost: Get Your Audience InvolvedOne of the biggest factors contributing to a video's virality is engagement. Social media platforms prioritize content that receives high engagement in the form of likes, shares, comments, and watch time. If your video sparks a conversation, it has a better chance of being shared with more people. To create engaging content, influencers must actively encourage audience participation. This can be done by asking questions, prompting reactions, or setting up interactive challenges. For example, posting a "This or That" poll, where viewers comment on their preference between two options, naturally increases engagement. Similarly, "Q&A" videos where you answer followers' questions keep viewers invested in your content.Challenges and contests are another excellent way to drive engagement. By encouraging viewers to participate, tag friends, or use a specific hashtag, creators can build community-driven content that spreads quickly. User-generated content (UGC)-where followers create videos inspired by yours-is one of the most powerful ways to achieve virality because it leads to exponential share growth. Using clickbait-style hooks, such as "Wait until the end to see what happens!" or "Can you spot the mistake?" can also keep viewers watching longer, which signals the algorithm to boost your video.5. Storytelling: Emotionans SoldA well-told story will mesmerize any audience, successfully stirring a torrent of emotions from viewers. Storytelling videos that are funny, warming, or just a tad dramatic have a high chance of going viral for the simple fact that humans are narrative animals. These stories attract sharing, saving, and commenting, making them friendly to algorithms. Among the most common viral formats of storytelling are personal journeys, customer testimonials, transformations, and plot twists. A well-laid-out video keeps viewers entertained until the very last second and, in return, babysits its viewers for eternity.Influencers are encouraged to use visuals, sounds, and text overlays to make storytelling more interesting. It is really important to grab people's attention right at the get-go, like saying, "You won't believe what happened to me today..." or "This is how I went from broke to succeeding in one year." A cliffhanger also works to maintain viewer interest; the more curious something looks to the viewer, the greater chance that they will actually stick around till the story has finished and share it.6. Behind-the-Scenes: Authenticity WinsAudiences love seeing the real and unfiltered side of their favorite influencers. While polished and curated content is important, authenticity is what truly resonates with viewers. Behind-the-scenes content creates a sense of intimacy and relatability, making it easier to connect with your audience on a deeper level.Sharing behind-the-scenes moments can take many forms. Some influencers show the making of their content, bloopers, or funny outtakes, while others document their daily routines, struggles, or personal experiences. Showing imperfections and vulnerabilities makes you more relatable and humanizes your brand. People enjoy watching "Day in My Life" vlogs, work setups, or sneak peeks of upcoming projects. Even a simple video of what goes into creating your content can be surprisingly engaging. The more transparent and unscripted you are, the more your audience will trust and connect with you.7. Surprise Factor: The Unexpected Goes ViralIt is a breaking fetish that separates all things magical from post-internet histories. The whacky, outrageous, and never-before-heard-of video happens to be a poster in front of the success bus. After all, reactions move people, so why should they not bother to share with others? They come as viral-audience videos featuring something amazing between optical illusions, brilliant transformations, or just a well-turned, funny twist at the end.They also tend to find an audience in reaction videos, where influencers record candid reactions to overwhelming viral content. On the other hand, it is suspenseful to delay everything until the end. Because you kept the audience craving, that meant longer watch time by those standards favored by algorithms. "I didn't see that coming!" is, however, the real winner.ConclusionGoing viral isn't the result of a single, lucky video; it's strategy, creativity, and consistency at work. We obviously must experiment a bit with different formats to get to know what resonates better with our audiences. Keep engaging, keep innovating, keep posting. You never know; that next one might just go viral.